| Version 61 (modified by , 55 years ago) (diff) |
|---|
Getting Started with OpenSHA Development
Obtaining Source Code
Three options are available to obtain the OpenSHA source code:
Browse Sourceon this website. Once in thetrunkfolder, the current release code may be downloaded as a zip file (the link is at the bottom of the page).
- Check the codebase out directly from our Subversion (SVN) repository. We recommend using a newer version of the SVN client, even if your computer already has a client installed. Navigate to the directory you wish to download the project to, and run (substituting your
usernameandpasswordas appropriate:
svn checkout --username <username> --password <password> http://intensity.usc.edu/svn/opensha/trunk
- Check the codebase out from our Subversion (SVN) repository using Eclipse (see below).
Obtaining Source Code via Eclipse
If you plan on working with OpenSHA, an alternative, and perhaps easier approach is to download the code from within Eclipse:
1) Download Eclipse
The latest version of Eclipse can be obtained from The Eclipse Website
The "Eclipse IDE for Java Developers" should be fine, however the Enterprise Edition (EE) will work as well.
2) Install the Subversion (SVN) Plug-in
The Eclipse SVN Plug in is called "Subclipse".
To install in Eclipse, follow the tutorial here: Subclipse Installation
(be sure to use http://subclipse.tigris.org/update_1.6.x as the update site when prompted)
3) Add the OpenSHA Source Repository
Once Subclipse is properly installed, from within eclipse:
- Select
Window > Open Perspective > Other. - Select
SVN Repository Exploringand hitOK.
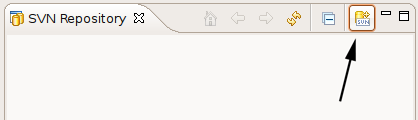
The SVN Repository tab should now be visible:
- Click the
Add SVN Repositorybutton shown here...

- Enter
http://intensity.usc.edu/svn/openshaas theURLand hitFinish. - Enter your
usernameandpassword.
4) Check out the OpenSHA Project
- Click the arrow to expand the repository tree.
- Right click on
trunkand selectCheckout...


- If you are happy with the default options (they are fine for most people), just click
Finish.- To specify where to put your "Working Copy" of the project, click
Nextinstead.
- To specify where to put your "Working Copy" of the project, click
- Be patient, it may take a little while to check out the entire project the first time.
- Once it is checked out, switch to the Java perspective
Window > Open Perspective > Java(orOther, thenJava). - More patience; it will probably take a little while to build the project as well (you should see
Building Workspacein the lower right corner of the Eclipse window.
Working with OpenSHA
The instructions above will enable any registered user to get a copy of the trunk or current codebase. Any new code by authorized developers, however, must be committed to the repository on a branch. The details of merging and branching are outlined in The SVN Book and we encourage everyone involved to keep it handy. Some very basic instructions and guidelines are provided below.
Branching
OpenSHA development occurs on branches. To create a branch:
- Switch to the
SVN Repository Exploringperspective (see Step 3 above). - Right click on
trunkand selectBranch/Tag...

- In the window that follows, enter the following address in the
Copy to URLfield, replacingusernameandbranchnameas appropriate:http://intensity.usc.edu/svn/opensha/branches/username_branchname
- Click
Finish(orNextfor more advanced options). - Once the branch is created, expand the
branchesfolder and check outusername_branchnameas a "Working Copy" usingCheckout...(see Step 4 above).
Merging
When new code is ready for inclusion in a release, project admins will assist with any required updates to a developers branched code and with merging it into the main line of the project.
Attachments (3)
- svn_branch.png (21.4 KB) - added by 14 years ago.
- svn_checkout.png (21.0 KB) - added by 14 years ago.
- svn_add_repo_button.png (6.6 KB) - added by 14 years ago.
Download all attachments as: .zip